DNS Security for iOS
The First app with DNS over HTTPS/TLS in iOS 14.
Project maintained by peterlee0127 Hosted on GitHub Pages — Theme by mattgraham
DNS Security
Secure DNS for iOS and Mac with DNS over HTTPS and DNS over TLS. Keep DNS queries encrypted without routing all traffic through a VPN server.
What DNS Security Does
DNS Security configures Apple’s system DNS settings to use encrypted DNS resolvers. It protects DNS lookups while leaving the rest of your network traffic untouched.
Features
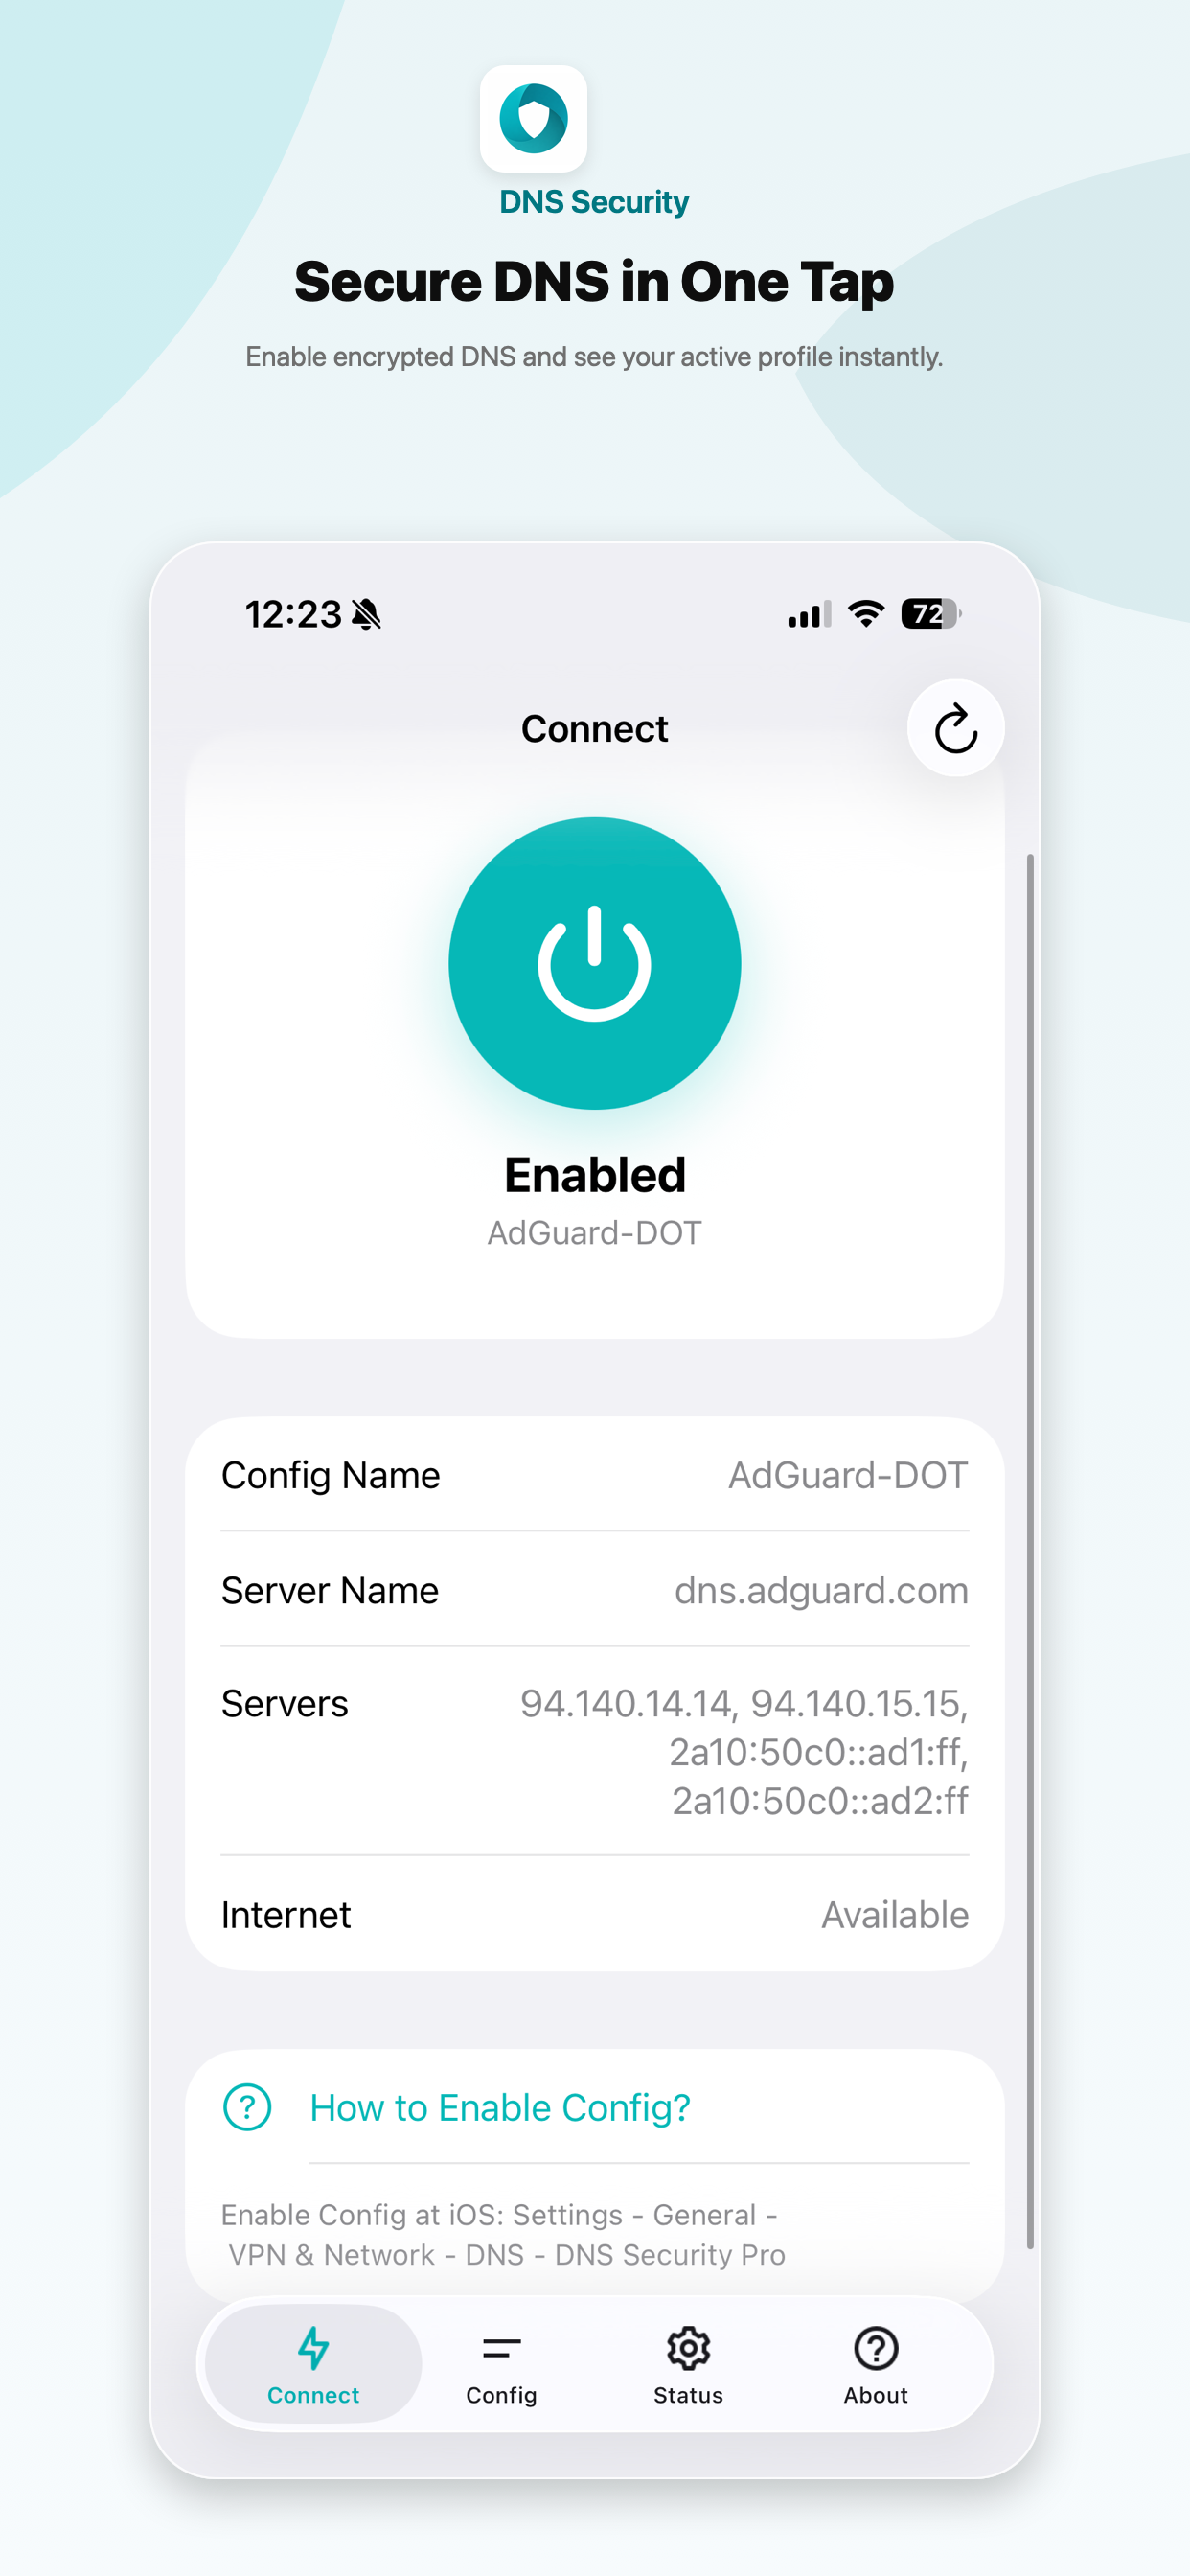
One-tap encrypted DNS
Enable DNS over HTTPS or DNS over TLS from the Connect tab and follow the system prompt to activate the DNS profile.
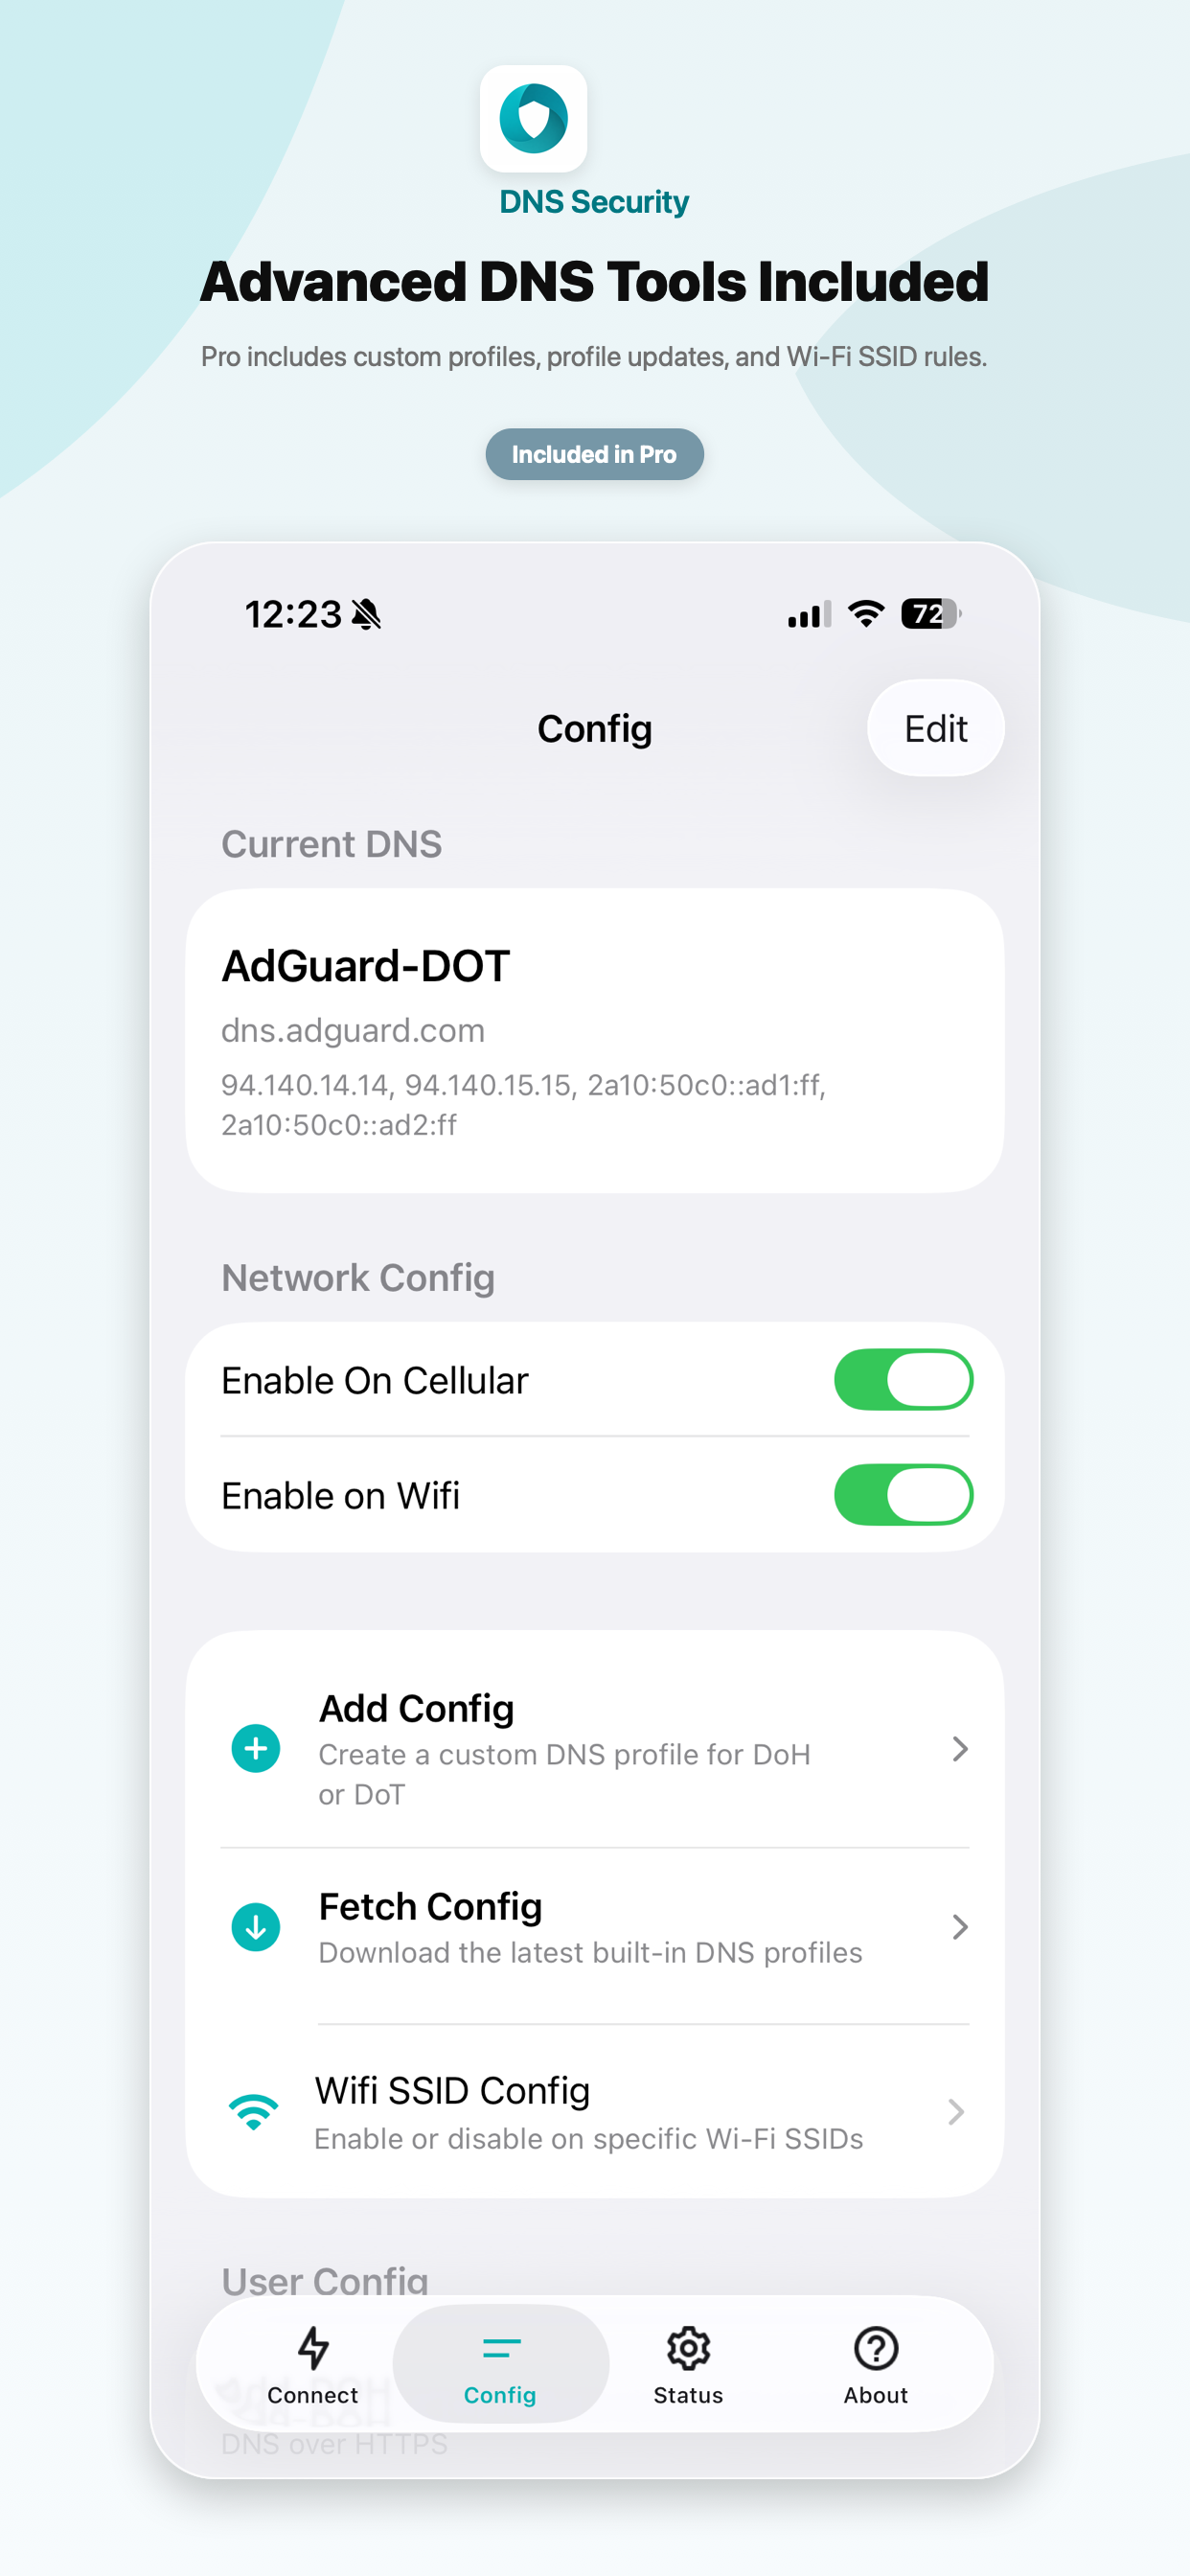
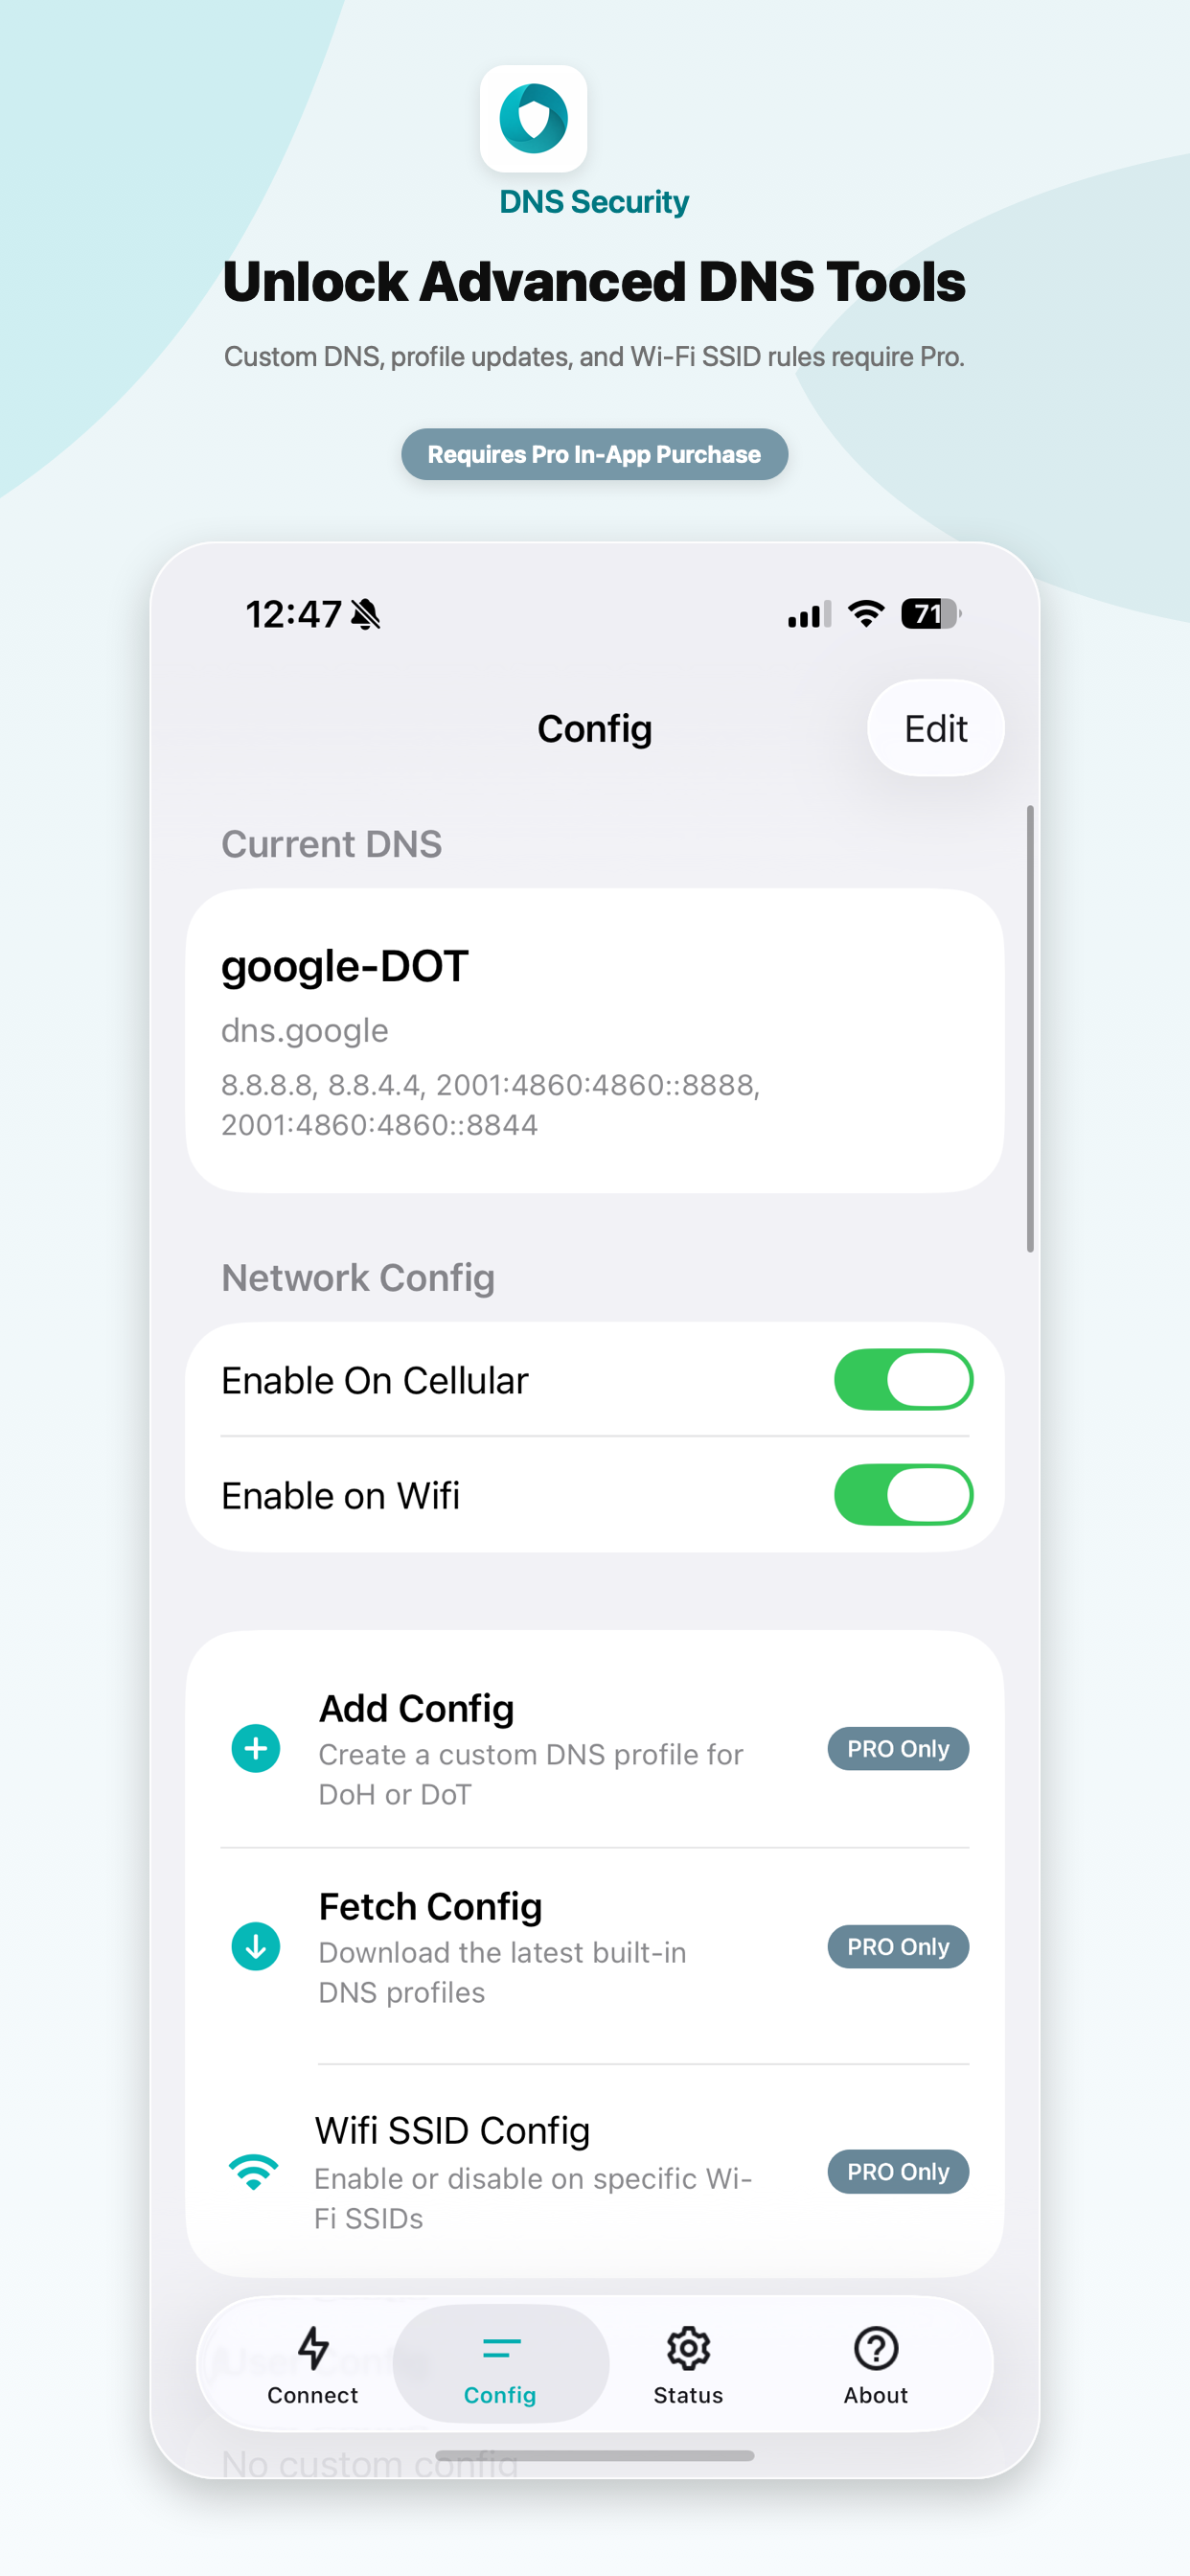
Built-in DNS profiles
Use trusted DNS providers such as Google, Cloudflare, and AdGuard, with Lite and Pro behavior clearly separated.
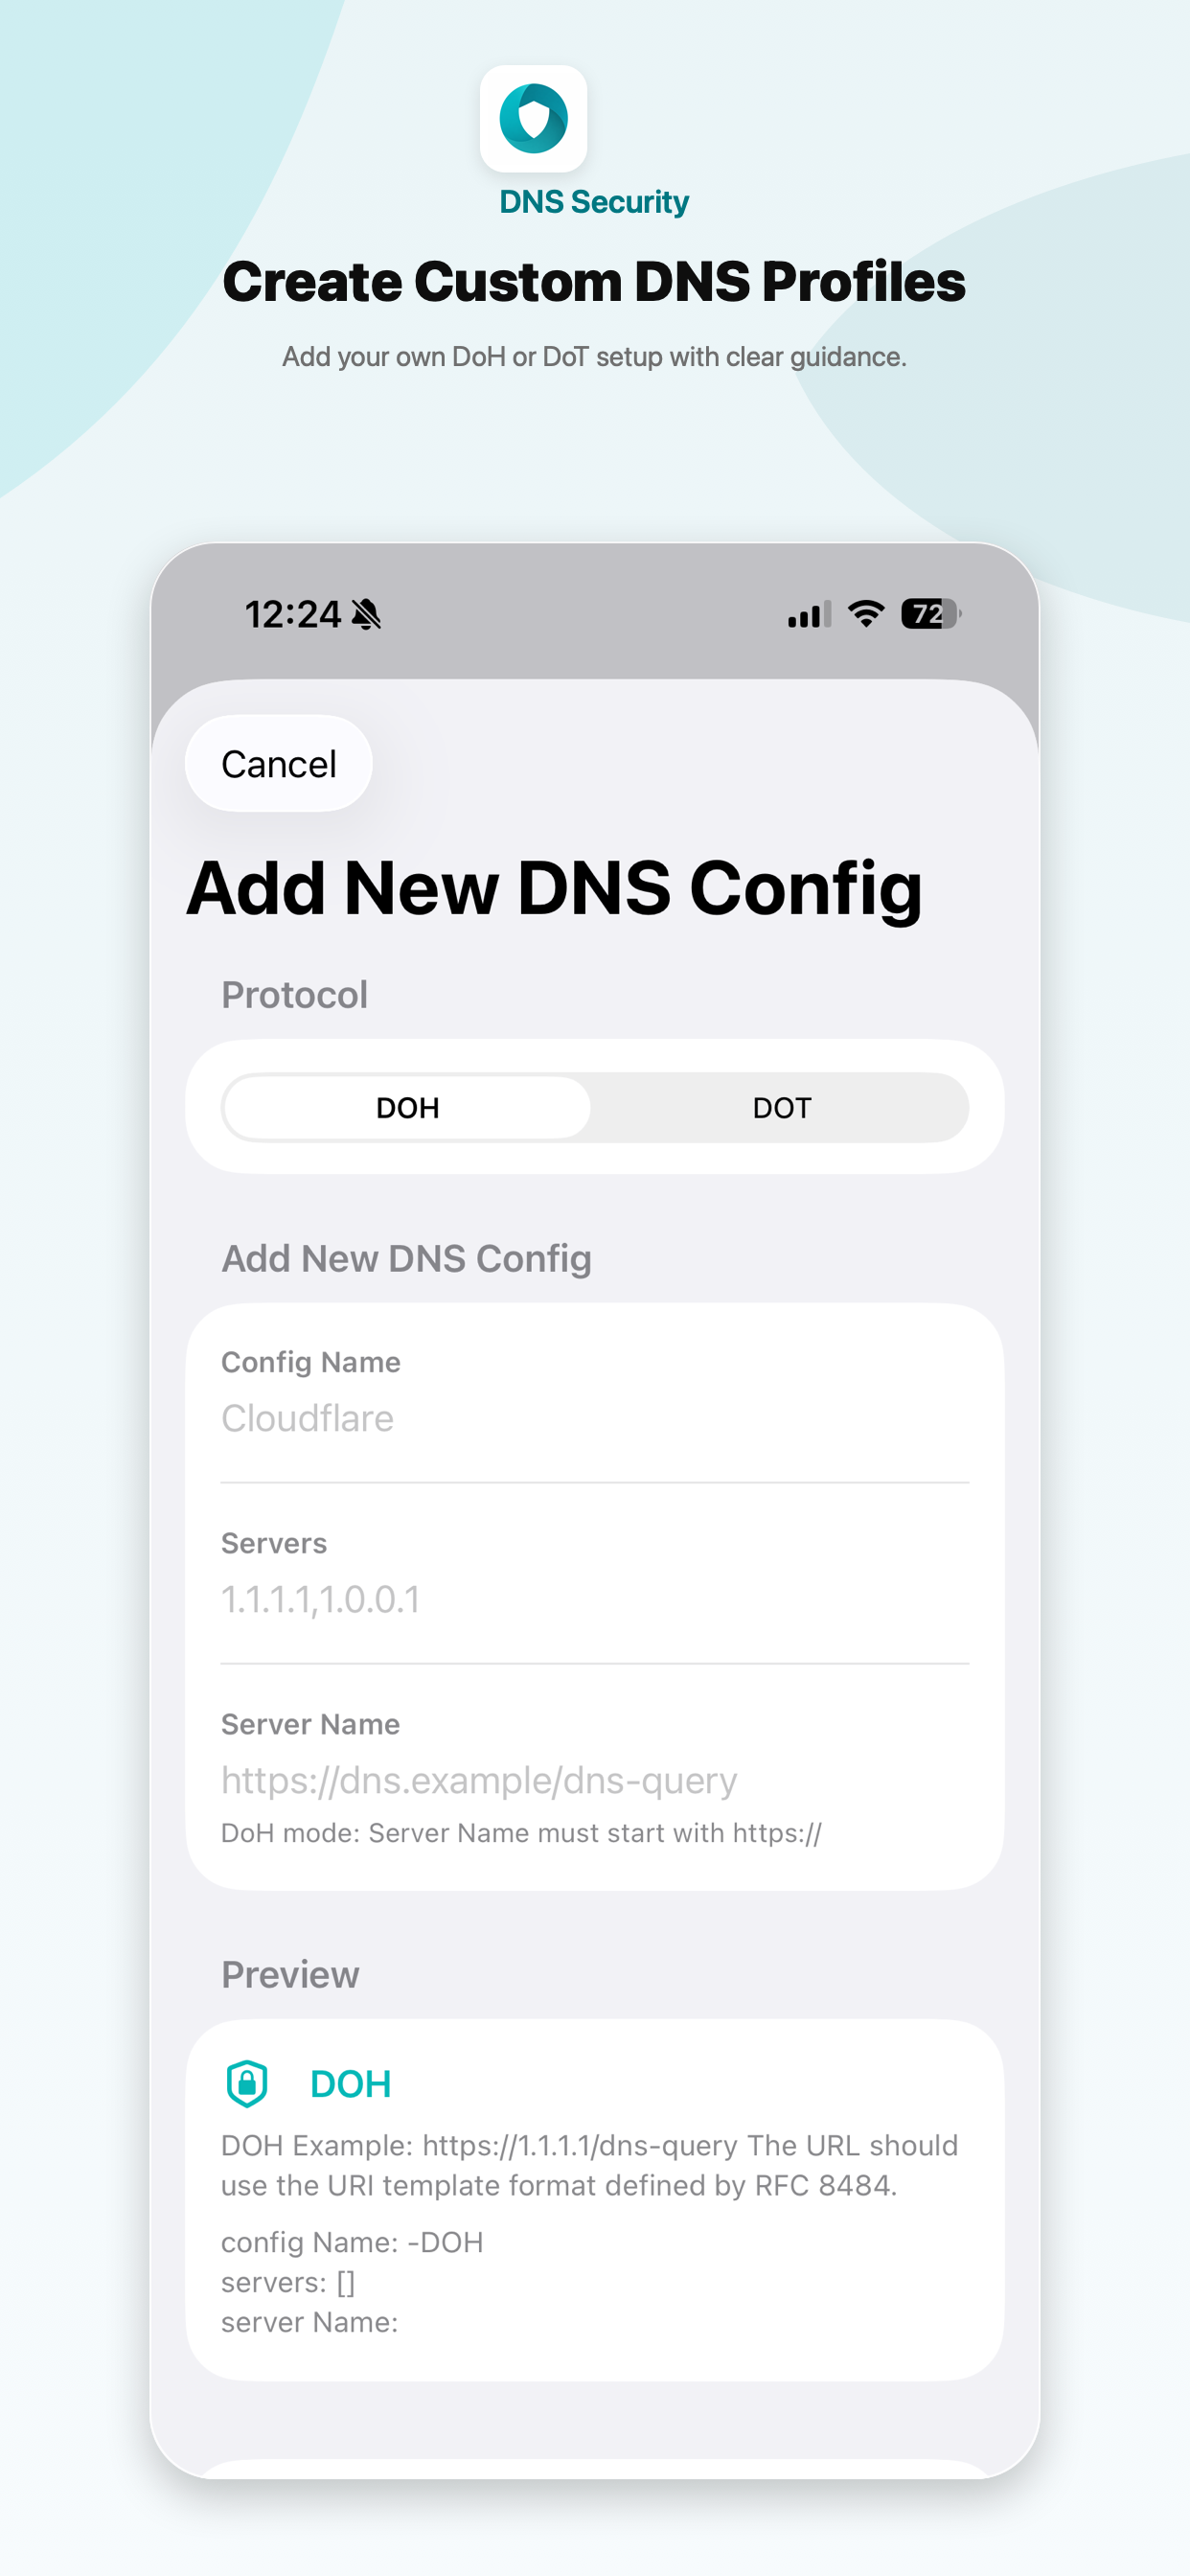
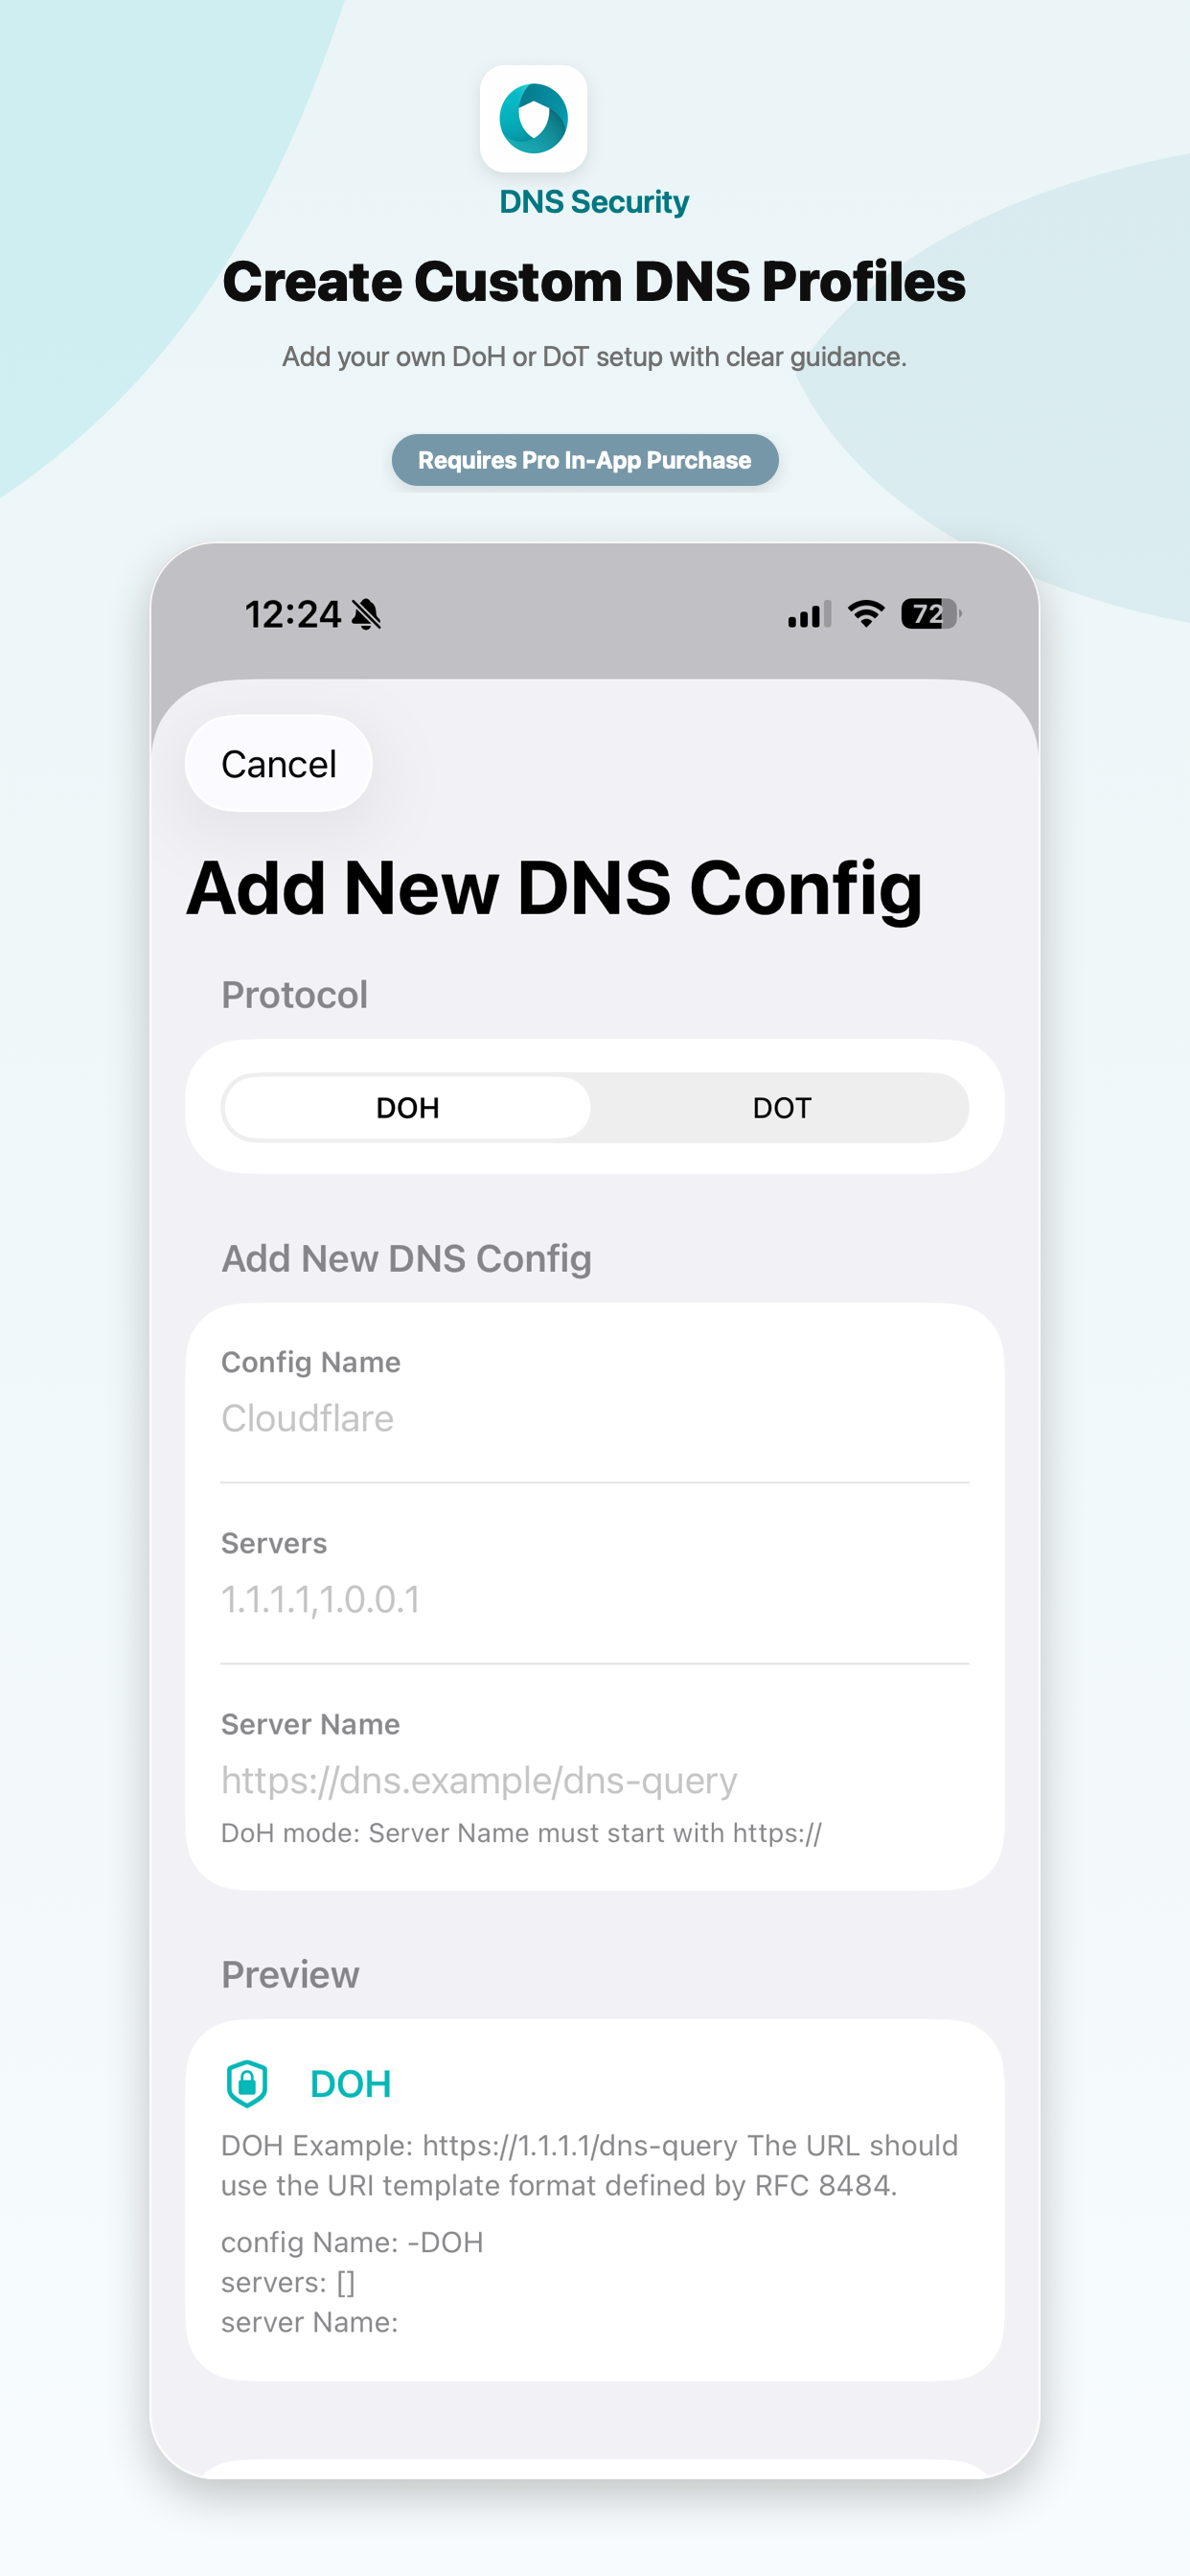
Custom DNS profiles
Create your own DoH or DoT profile with validation for DNS server addresses and server names.
Wi-Fi SSID rules
Choose where DNS should be enabled or disabled by matching Wi-Fi SSIDs.
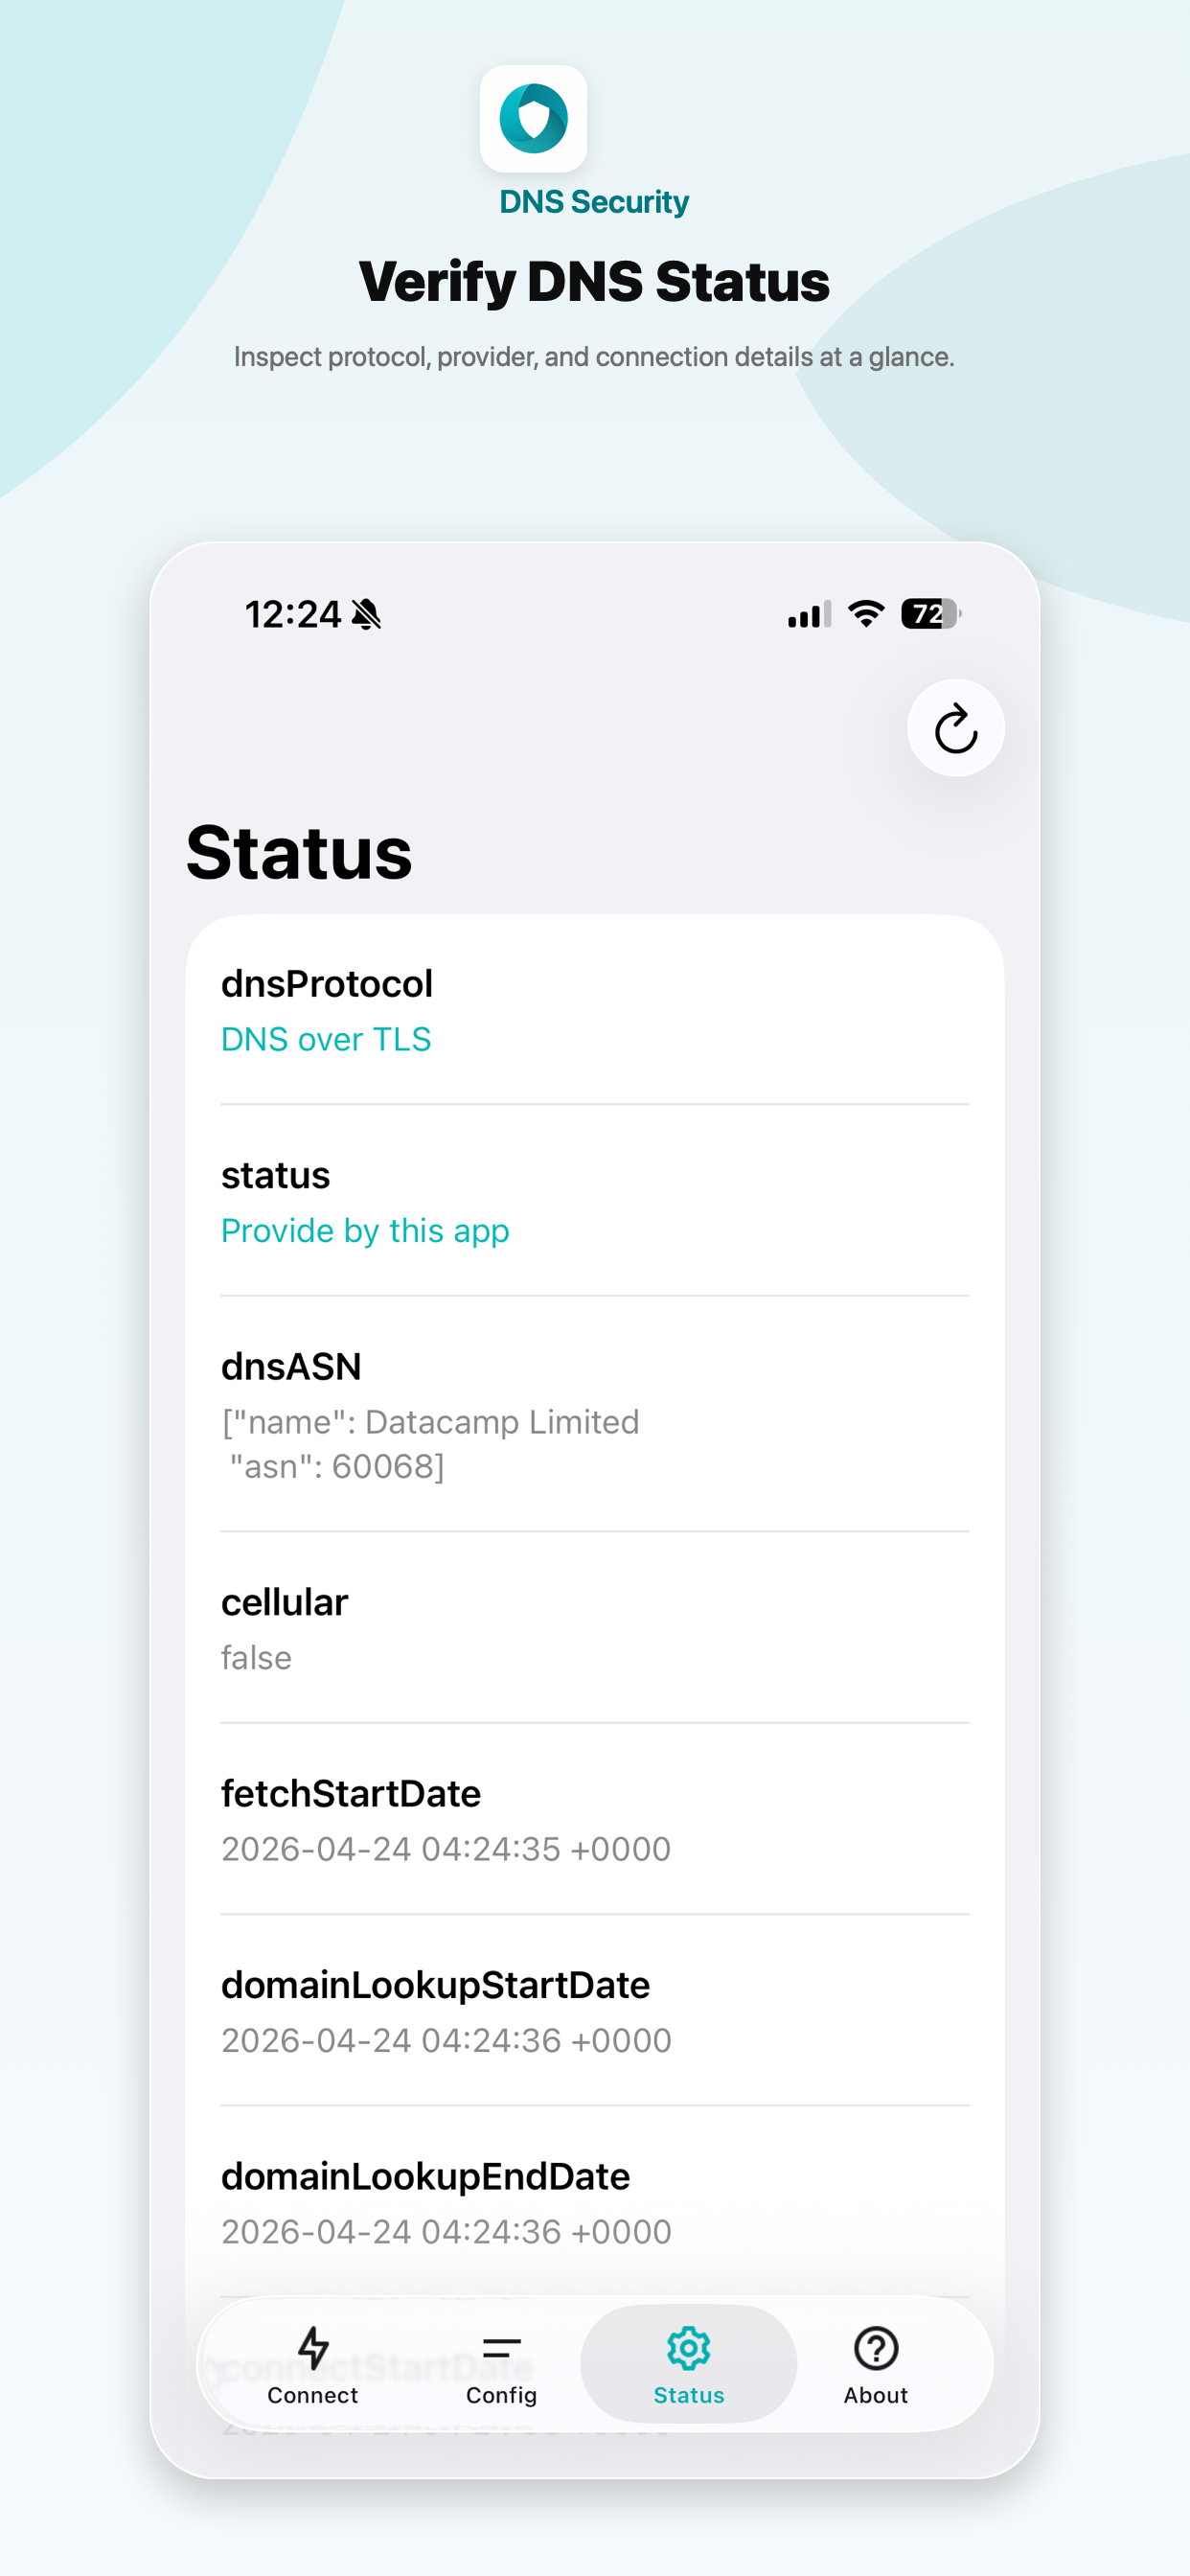
DNS status check
Review the current DNS profile, protocol, proxy state, and network status from the Status screen.
Shortcuts support
Pro users can switch DNS profiles from Shortcuts or other apps with the custom URL scheme.
Screenshots
Lite and Pro
DNS Security Lite includes the core encrypted DNS workflow. Pro unlocks advanced controls such as custom DNS profiles, Wi-Fi SSID rules, and profile switching from Shortcuts or other apps.
DNS Security Pro is a separate paid app with Pro included from the start. DNS Security Lite can unlock Pro features with an in-app purchase.
How to Enable
- Open DNS Security and choose a DNS profile.
- Enable the switch in the Connect tab.
- Open iOS Settings.
- Go to General - VPN & Network - DNS.
- Select DNS Security.
On Mac, enable the DNS proxy in System Settings - Network - VPN & Filters - Filters & Proxies.
Privacy
DNS Security only configures DNS resolution through the provider you choose. It does not route all traffic through an app server, and it does not collect your browsing data.